
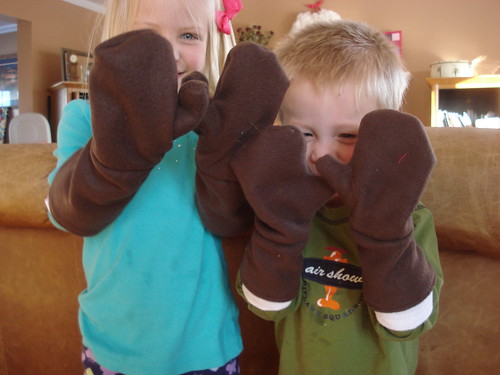
It's cold here. And there is snow. Someone told me there is currently show in 49 of the 50 states. That's a lot of snow. For me, snow usually means sledding. Sweet Pea LOVES sledding. Jojo is not quite as much of a fan but he's coming around. I posted yesterday about how much I hate taking the kids sledding and seeing snow fall into that little gap that sometimes shows up between their mittens and their coat sleeve or the bottom of their snow pants and their boots. I've solved the bar leg problem by having my kids go sledding with their footie sleeper pajamas on under their snow pants. I solved the cold wrist problem by creating these serious mittens!
To make your own. You will need the following:
- fleece
- 1/4 inch elastic, enough to go around both of your child's wrists
- a pair of socks
- sewing machine, pins, thread, etc
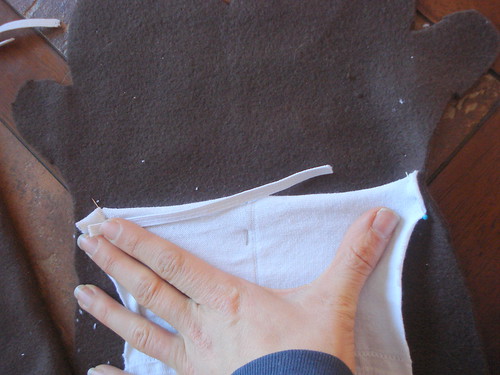
Start by tracing your child's hand or a mitten they are already wearing. Place your child's pinky finger along the fold of your fabric. (I forgot to do this in the photo) Be sure to add an extra 1/2 inch or so for wiggle room and seam allowances. When tracing, be sure to flare out the cuff as it will need to fit over your child's winter coat. Also, make a small mark at your child's wrist. This is where you will sew in the elastic.
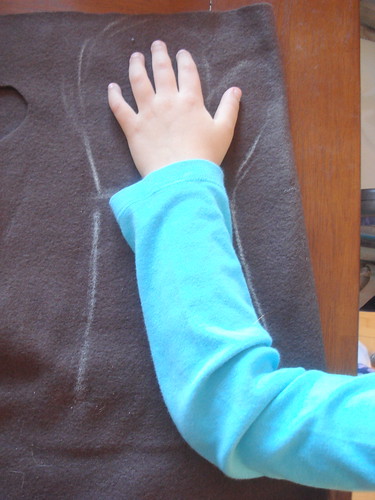
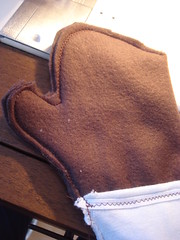
Do this twice. One for each hand and cut them out. These are Jojo mittens folded over. We traced his mitten since he was napping.
Next get out your pair of socks. I picked these up at Target. They are knee socks and worked to make both pairs of mittens for the kids.

Hold the sock up against your child's arm to determine how long you want the inner cuff of your mitten to be. I did up to the elbow for both kids. Cut off the top part of your sock.
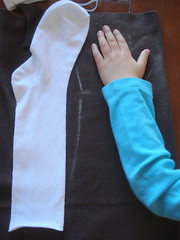
Next, cut your sock tube open along one side. Seems a bit silly because we will sew it up in just a minute but this is what worked for me.
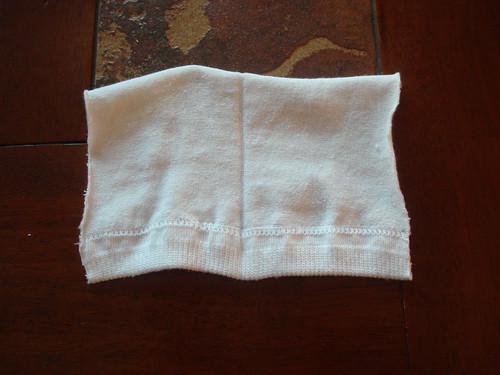
Next you will want to hem the bottom of both of your mittens. I forgot to take photos of this step. All you need to do is fold up the edge about 1/4 inch and sew. No need to finish the edge as the fleece won't fray. Next, pin one of end of your elastic and one end of your sock to the mark you made earlier where your child's wrist is. Place your sock with the wrong side facing up. This is the inside of your mitten and cuff. Stretch the sock and pin at the other side.
Next. Sew your sock and elastic down starting with a straight stitch for just a few stitches and then switching to a zig zag stitch. You will stretch both the sock and the elastic as you sew.
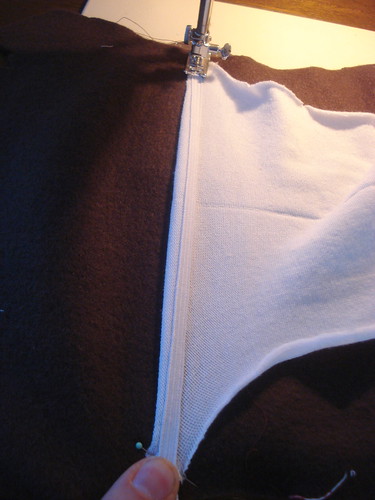
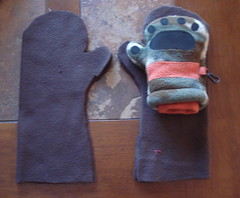
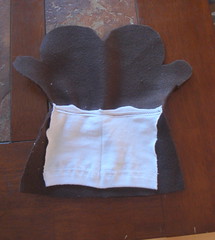
It will look something like this when you are finished sewing down the sock and elastic.

Now, fold your mitten right sides together. Take JUST the sock and sew up the side seam. I used a zig zag stitch for a bit of stretch. Be sure not to sew the sock to the cuff of the fleece mitten.
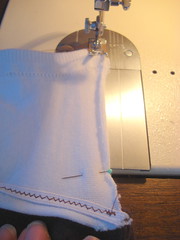
When the sock is sewn, fold it down and sew the outside seam of the mitten.
Next fold the sock portion up, and sew up the side seam of the cuff part of your mitten. Be sure to end your sewing as close as possible to the sock to close your mitten.

Trim your threads, clip a bit around the thumb of your mitten and turn the entire mitten right side out.
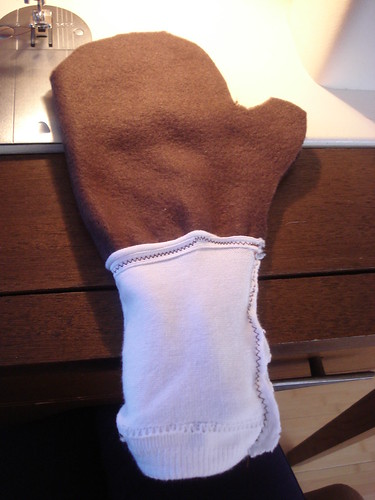
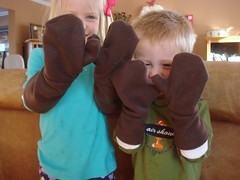
Here Sweet Pea is showing you how super duper long her mittens are, especially that inside sock layer.
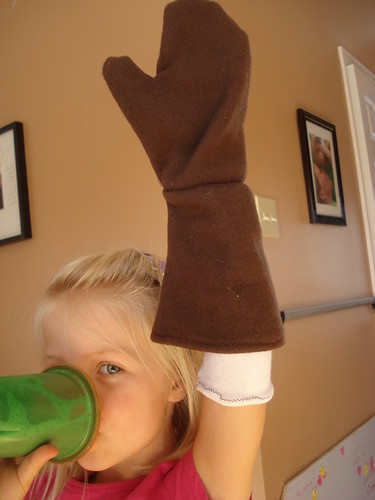
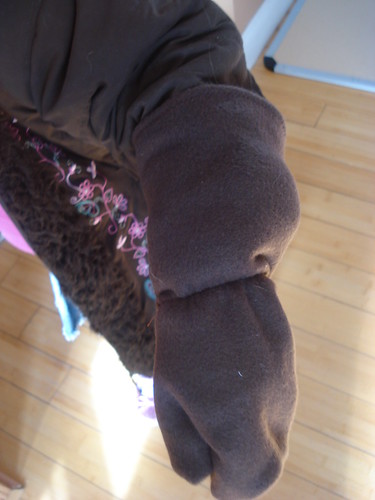
To wear these, put the mittens on. Fold the fleece up up over the hand. Tuck the sock sleeve up inside your child's sleeve. This can go under or over a long sleeved shirt. It's pretty stretchy.
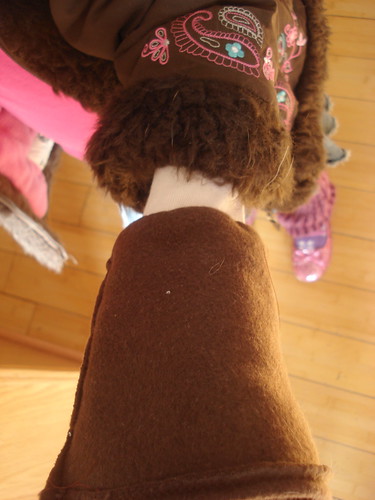
Then fold the fleece cuff over the top of the coat and you are ready to go! There is no way any snow is getting in there!!!
I'm am not the greatest writer of tutorials as I am very new to this. Please let me know if you have any questions or need clarification on any of the steps! Thanks for reading and stay warm!!


Such a great idea. We live in Las Vegas so we only saw a little flurry of snow once this year but I think I will try to make these for my little sisters who live in cold weather the majority of the year. Thanks for sharing the tutorial.
ReplyDelete