Pages

Wednesday, September 29, 2010

Pants into pants


Yup, made pants out of pants. Made by tracing a pair of pants that fit my girl really well. Please excuse the miserable camera phone photos. Seems my husband took off for a 5 day trip to the frozen tundra of northern Wisconsin with my camera. Lovely. These pants were cut from an old pair of stretch cords of mine that were missing a button on the back pocket. I actually had them in the pile for JoJo but when I realized how stretchy they were they didn't seem quite right for boy pants. Although, now that I think about it he really needs some stretchy pants he can get on and off himself since he insists on stripping naked from the waist down every time he goes potty. Yup, socks, shoes, everything. . . . but I digress. Whipped these out during nap time and was almost done when Sweet Pea spied what was left of the old cords on the table and insisted I put the ribbon label and a pocket on her pants. So we did. I cut them out and ironed them on using some steam a seam 2 and did a bit of stitching around them and we were done! 
- Posted using BlogPress from my iPhone

Tuesday, September 28, 2010

The Warhol Dress

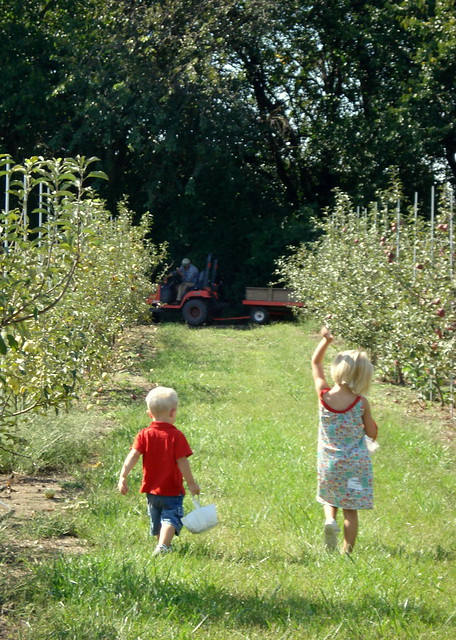
Everyone needs a sundress for apple picking right?? Well they sure did here in Saint Louis last Thursday when it was 90 degrees!


I have been following Dana's blog MADE for quite some time now. It's one of the blogs that inspired me to sew clothes for my kids.  Seems she is always coming up with her own patterns and the CUTEST stuff for her kids. Who, from what she writes and the photos she posts, reminded me a whole lot of my own. A few months ago she shared the free pattern for the Warhol Dress and I added it to my list.  My only dilemma was that the pattern only goes to a size 3-4 and my girl is a size 5-6. I managed to print it and add a little extra length when cutting the pattern which worked just fine. Helped that I had this very strange old "grandma's basement" smelling polyester type knit fabric that needed to be used up. I wasn't sure how I'd like the grandma print but it works for me!

make it wear it

Sunday, September 26, 2010

Kids Clothes Week Challenge - Project #2


Yup, two dresses. That's all I did this whole week. I had great ambitions for turning out some appliqued t-shirts for Jonah and a couple of pairs of pants for him too but it just didn't happen. I swear that 5 am wake up just did me in this week. And then the button holes on this dress. Seriously, I think I did over 100 practice button holes trying to get my machine to do them correctly. I am using a machine that I don't have the manual for so thanks to the magic of the internet I finally got the button holes figured out. Good think too since I had to do EIGHT button holes.

There's something about brown corduroy that I just love. Fall, pumpkin patches all that stuff. Now, to find a shirt that will work better than the way to small one in these photos. Oh and those buttons. I am having a bit of an obsession with the color aqua right now so these little aqua blue flowers were perfect!


Many thanks to Christine from the blog From an Igloo for the great tutorial!

Friday, September 24, 2010

Pint Sized Project - Funny Fridge Pumpkins

So I have been plugging away on sewing project number two for the Kids Clothes Week Challenge. I hit a stopping point though because I have never done button holes and the super cute jumper tutorial from From An Igloo calls for buttons and button holes. Lots of them. So, until I practice some more we are doing a few other things.

This is one of them and was a last minute brain storm when Sweet Pea was begging to do a project yesterday. I like to do things that she can help with or complete herself.

For this project you will need:
Orange card stock, construction paper, or regular paper
craft foam - we used black & yellow
magnet strips with a peel and stick adhesive back


I started by tracing several pumpkin shapes on orange construction paper. Sweet Pea cut them out. She has mad scissors skills for a four year old!

While she was doing that I cut several eye, mouth & nose shapes out of black craft foam. I also cut a few yellow pieces to make the "whites" of the eyes and glued those to the black ones with the glue gun.

We then cut the magnets into strips and put a small piece on each of our face pieces.

Finally we taped our pumpkins to the fridge and made funny faces!


Wednesday, September 22, 2010

Hi mom!?

So I figure my mom is probably clicking on the link and reading this. Is anyone else?? Let me know what you think? Comment, follow the blog, whatever. Thanks so much!

Sarah

Kids Clothes Week Challenge - first project complete!


So really this dress should have been done on Monday. Really. But JoJo has been getting up so darn early that I am just totally out of steam by the time I think about sewing after the kids go to bed. Last night I thought "oh I'll just finish this up real quick" and made a huge error and ended spending the 30 minutes I wanted to use to finish the dress having a date with my seam ripper instead. I took that as a hint to go to bed.


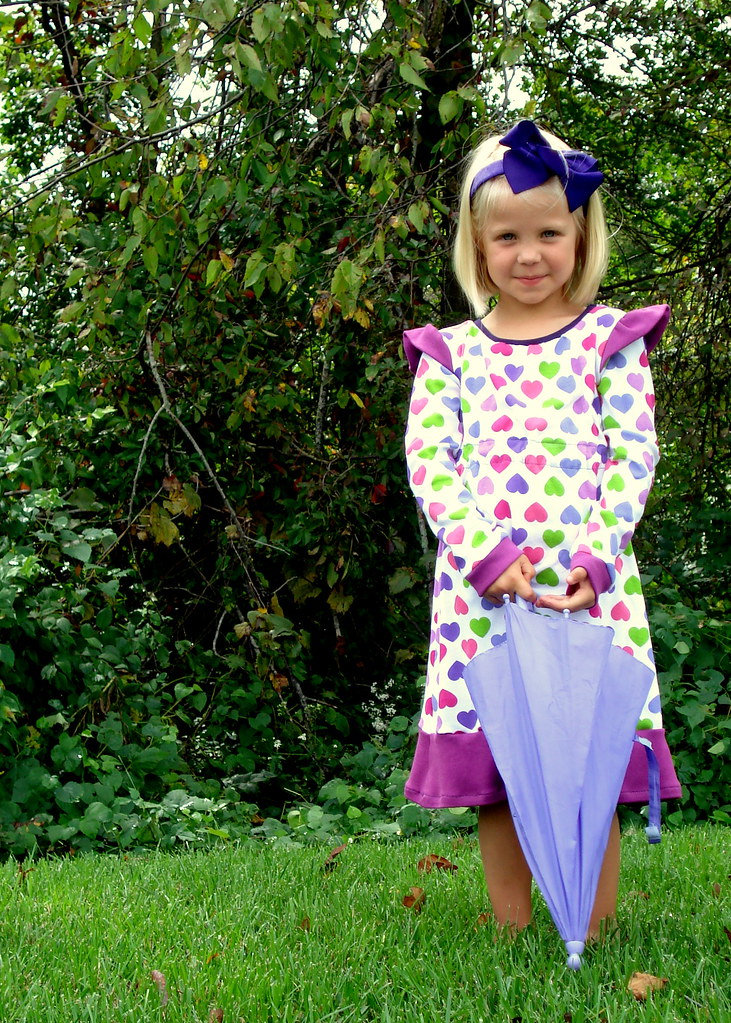
Anyway, it's done! She likes it and it fits and unless she has a wicked growth spurt, it should keep fitting through the winter. I used the Go to Dress Pattern from Train to Crazy but added a an extra strip of coordinating fabric at the cuffs and sleeves to extend the pattern from a size five to a size six. As for the ease of using the pattern? I found it easy to understand. The only part that I had a bit of trouble with was sewing the casing on for the elastic. I think if I make it again, I may do a shirred waits instead. Also, I showed the dress to a friend who thought it would be just as cute without an elastic waist!


So where is Sweet Pea going in her "Go to Dress"??? UP up and away apparently!


Monday, September 20, 2010

Kids Clothes Week Challenge


Meg over at the blog Elisie Marley is hosting a Kids Clothes Week Challenge as part of National Sewing month. I had a couple of dresses on my list to sew for Sweet Pea so I figured I'd participate. Helps that the hub is out of town for work this week so I have a little extra time on my hands. That and the great and wonderful JoJo keeps insisting on waking up at 5am no matter what I do to try to get him to sleep later. So yeah, lots of time for sewing at dark o' clock while he plays with his trucks under the table.

First on my list to sew is the Go To Dress from the Train to Crazy.

Miss Sweet Pea is totally a dress girl, and it's really hard to find play dresses that are comfy and cute and age appropriate for a four year old who is the size of six year old. Seriously, last year I gave away most of her pants since she refused to wear them!! I spent yesterday cutting out all the pieces and realizing that I should have had them cut my fabric a little different at the store. Alas, I "made it work". I spent some time this morning starting the sewing and will get some photos over here during naptime!

Thursday, September 16, 2010

A tie at tea time

I think all small boys should wear ties to tea. Don't you?


If you agree, there is a very easy tutorial from Saltwater Kids. I mean really super easy!!


- Posted using BlogPress from my iPhone

Apple Hand Pies

So I like to cook and bake and stuff. I probably like it as much as I do crafting. It's something about the need to create something. I like both because they produce a tangible product in a short amount of time. So today it was Apple Hand Pies, hand pies crafted by little hands who couldn't keep themselves from snooping dough and apples and poking their fingers in in. Oh well, such is cooking with kids. I can handle it. Good thing since I couldn't handle them banging the rolling pin on the counter! So yeah, I rolled these babies out!! Try them. I will. After nap time. I mean and we made them after lunch and I told the kids they had to cool first.


see that napkin?? Yeah I sewed it. :)

For CRUST:

1 1/8 cup flour
1/2 tsp salt
1 tsp sugar
8 T chilled butter, cut into cubes
3 T ice water

Add flour, salt & sugar to the bowl of a food processor and pulse once or twice. Add butter and pulse until it looks like cornmeal. Sprinkle water over the top and pulse until the mixture forms a ball. Add more water if necessary. Form dough into a log and slice into 6 equal portions. Wrap each one in plastic wrap and put in the freezer for at least 10 mintues.

For FILLING:

3 apples
1 T lemon juice
1/3 cup flour
1/3 cup sugar
1 tsp cinnamon

Peel and core apples and slice into thin slices. Mix with flour sugar & cinnamon.

To assemble pies. Roll out each portion of dough until thin. Place a small amount of filling in the center of each one. Fold over dough and press with fingers to seal. Vent each one with two small slits in the top. Bake at 400 degrees for 25 - 30 minutes or until golden.

And I totally forgot to add that the best part of this recipe is peeling the apples! Last year we were gifted with a very special apple peeler. It belonged to my husband's grandmother. Sweet Pea is 4 1/2 and has no time making it work. Jo Jo gave it a try too. And the dog helped by eating all the apple peels!


A Headband for Sweet Pea


See these. Pretty right. Pretty random. This summer we were blessed to have the company of my sister Bethany for three months while she completed an internship at an interior design firm. (Have I mention I have THREE sisters who are all PROFESSIONAL artists??) Well since she worked in the materials library we were also blessed with a mountain of samples of discontinued items. So yeah, those lovely colored squares of vinyl were once options to cover office chairs. Cool huh??


So of course, I hate tossing cool things in the trash so I had to come up with something to do with them. I had seen a few tutorials out there for similar headbands and with a little tweaking came up with this.


apparently she likes it since I had this on my camera too. What a goober!

Wednesday, September 1, 2010

Bag Tag


See her?? That's Sweet Pea. She loves projects and takes them very seriously. Our project for yesterday was to make a luggage tag for her brand new backpack. Last year I was annoyed when her teachers put her name on her bag with a permanent marker meaning u can reuse it for her baby brother with out crafting a patch of some sort. So this was an easy peasy scrapbookpaper plus modpodge plus glitter = one happy four year old project.


To do it we traced an old luggage tag on scrapbook paper and modpodged it to the tag. Next I cut out the letters of her name & she modgepodged those on. Then we sprinkled with glitter & let it dry.

Must add photo of the tag in action! And yes, I shop at Aldi.

ETA: all done and ready to go!

a new beginning

So in the past year I have become addicted to reading craft blogs. And creating crafts. NOt always so well but it's all about doing something right!

So much of the crafting is about my daughter, Sweet Pea, and son, JoJo. No, not their real names but what they get called a good part of the time. Lately it's been sewing. Dresses, t-shirts and other random stuff.

I dont' feel like much an innovator myself but really like using other people's tutorials and changing them up a bit.

SO, here we go, the world of craft, cooking, parenting, whatever blogging. I will warn you that my grammar may not always be good and that you may be subject to lots of photos taken with my iphone. I blog because I want to, for me so if I want to use my iphone to post, I will. :) If you are here and reading, enjoy.