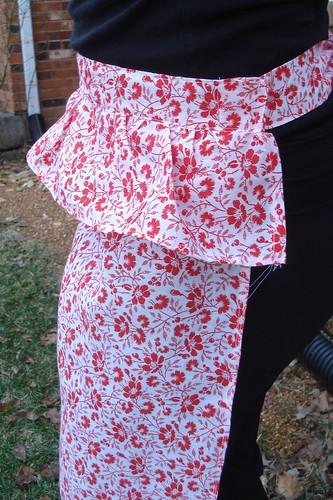
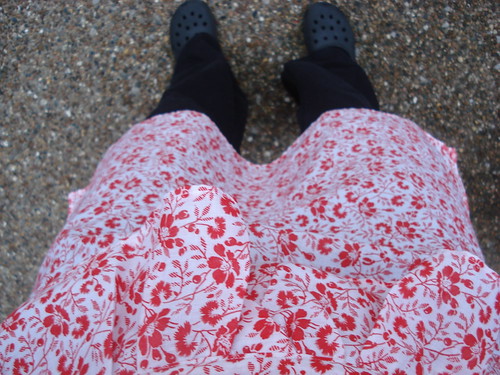
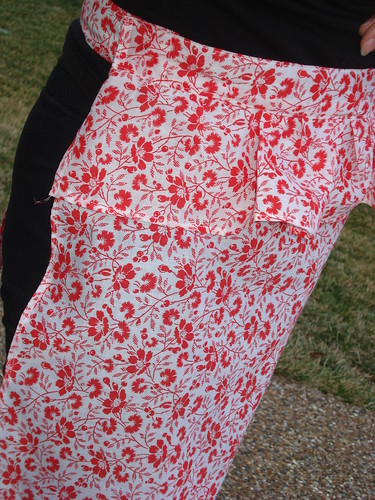
I would just like to say that it's virtually impossible to take a good photo of yourself wearing an apron?? Having a small child attempt to take the photo isn't much better. That said, I present you with my version of the Kitschy Apron from the book One Yard Wonders. It really would have been cuter with contrasting fabric for the ruffle but I scored four yards of the red and white print for two dollars at my local goodwill and I wanted to use it up!
I'm hoping to make a couple more of these to give as prizes for the games at my sister's vintage kitchen themed bridal shower later this month! I scored some red fabric in the dollar room at the thrift store this morning to use on the next one!
Monday, February 28, 2011
Sunday, February 27, 2011
Something on Sunday - Poof Headband
How about a little bling for Oscar Sunday??? I saw some tulle poof headbands in Old Navy last night and thought "I could make something like that." And have you been in there lately?? There are a million embellished t-shirts on the shelves. It really made me wonder if the designers from Old Navy are reading craft blogs for ideas!?!?!
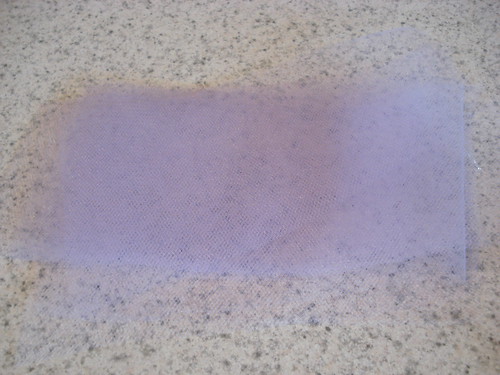
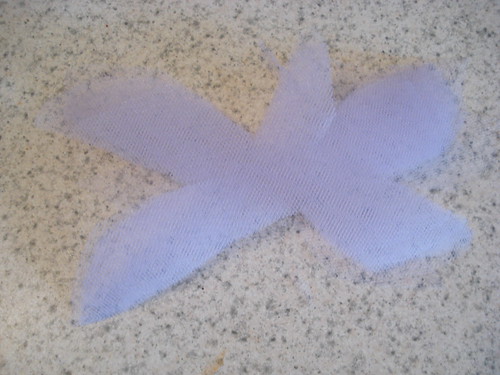
Start with some tulle. I had some from a tutu project gone bad. It's the kind that comes on a roll at Michael's for weddings and such. Cut some squares or rectangles. You'll need at least 10. This is kind of free form.
Trim your rectangles into sort of a flower shape.
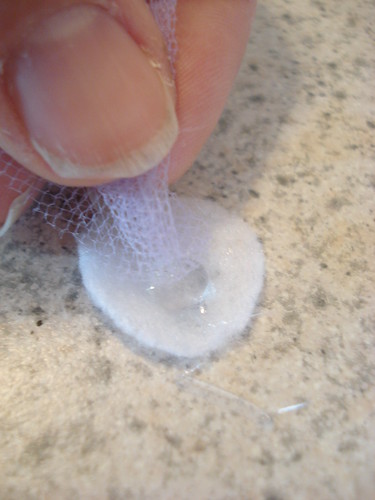
Next scrunch them up in the middle and hot glue them to a little circle of felt. Mine was about the size of a dime.
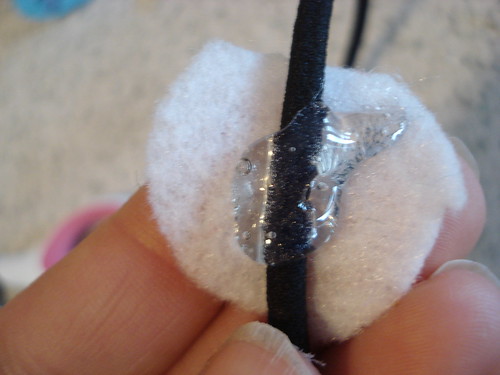
When you are done gluing on your stack of flowers. Take another circle of felt and glue it to your headband. I used the stretchy elastic sort but you could use any headband, clip or pin.
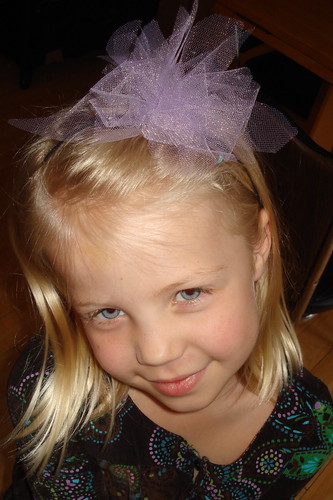
Finish by sticking it on your Sweet Pea's head :)
Take an obligatory picture of the baby brother modeling reindeer antlers despite the fact that it is nearly March. Fun times around here I tell ya!
And I'm off. Girls only Oscar party tonight. Sweet Pea just said "Dad, get your lazy butt out of bed and feed us some supper." :)
Friday, February 25, 2011
Billions of Buntings
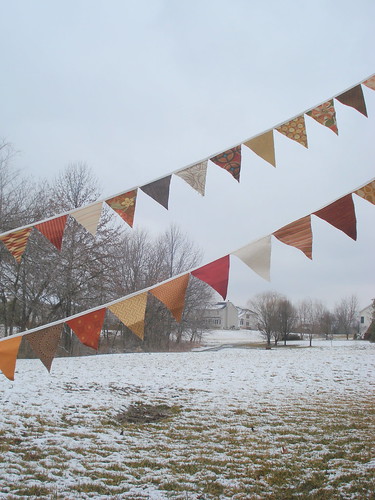
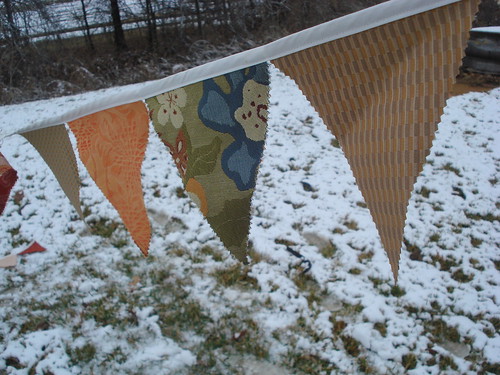
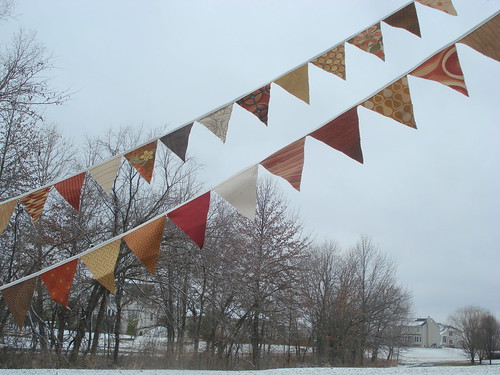
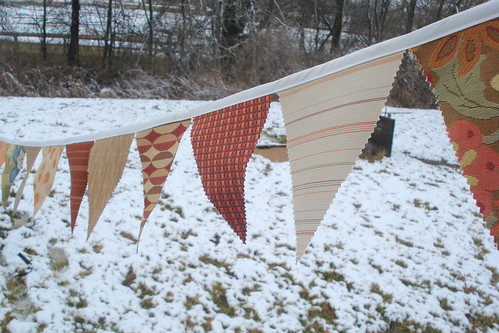
Yes, Billions. At least that's how many buntings it seems like we need for my sister Bethany's wedding in June. Actually I think it's something like 33 nine yard buntings. Peter, her soon to be husband did an exact calculation using the diameter of the tent they are renting and allowing for a 12 to 18 inch "drape" in the buntings. Nice to have an engineer in the family :) And theses photos are of the two that I have completed. . . . . so many more to go.
I have to report that the most difficult part of the project has been cutting all the triangles. They are cut from samples of discontinued decorator fabric. So think about cutting the stuff your chair is covered in. Oh and think about doing it using sometimes difficult pinking shears. Hard work. My mom, myself and all three of my sisters had a bit of a "bunting" party over the holidays. We popped in a DVD of Anne of Green Gables and went to work with two people marking fabric and two cutting. It was a cozy night until all of us had aching hands.
I honestly can't wait to see how these look decorating a big tent on a lovely June day. I'm sure I'll have more photos to share then! I sure hope it's warmer than the slushy day we are having here.
Wednesday, February 23, 2011
The Butterfly Clippie
I am having a heck of a time pulling out of the post vacation slump. My kids are all out of whack too and Jojo has been back to getting up at 4:30am again. Not so fun. I also have some other things on my plate like planning a bridal shower for my sister to be held in less than a month and finding out that Jojo is going to need speech therapy of some sort. Guess it's a problem when only your momma can really understand what you're saying. Anyway, those two things took over my day yesterday but I still wanted to share something with you today.
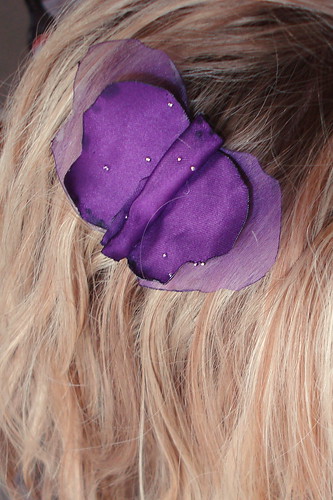
I was on a roll before vacation making a bunch of clippies for Sweet Pea. I spent a whole evening cutting little circles and melting the edges to make flowers like this. After a zillion circles, I was done and wanted to see another shape!!! The gauzy fabric reminded me a bit of the wings of a dragonfly and I suggested a dragon fly clippie to Sweet Pea but she was not convinced, so a butterfly it is!
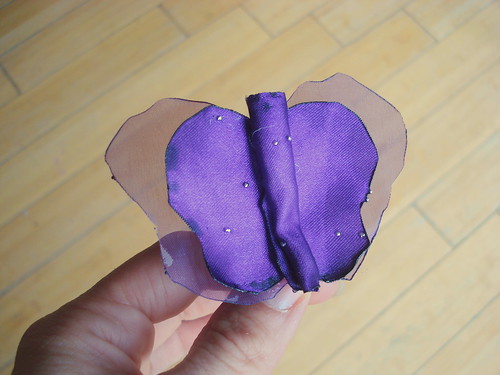
I made this by cutting butterfly shapes out of my two fabrics. One is a silk type fabric and the other is some gauzy. Sorry I'm awful with actually knowing the names of fabric. They are both synthetic. I cut one butterfly a bit larger than the other. Next I melted the edges with a candle to prevent fraying and glued to the two together with my trusty glue gun. You could also stitch these together but I was feeling lazy. I finished the butterfly by rolling a small square of fabric into a tube and gluing it to the center. I also attached a hair pin to the back.
I'm not sure I adore this one. I want to experiment with adding more layers, more colors etc.
Tuesday, February 22, 2011
Home Again, Home Again, Jiggety Jig
Yup, I made it back from the great and wonderful Florida safe and sound. I'd really like to be back sunning my backside at Cocoa Beach or even swimming in the heated hotel pool, but instead I enjoyed a rainy President's day back in STL yesterday. Such is life.
It was quit the trip. A wonderful time dotted with a few bumps. I mean really, no one wants to have to get a root canal while they are on vacation and it really blows when your baby boy comes down with the stomach flu on the night you have a date scheduled with your husband. Oh and then it blows more when he passes his stomach flu to his mommy and his auntie. (and as of yesterday his uncle) So yeah welcome home.
Highlights of the trip
- Sweet Pea meeting the Disney Princesses.
- Sweet Pea's first roller coaster!!!!
- Quality family time
- sun
- sand
- Shamu!
- So much more
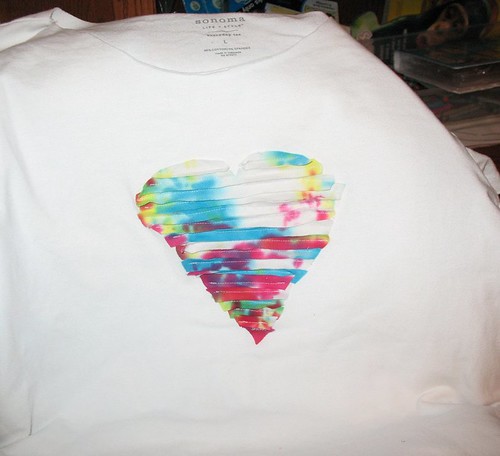
I wanted to share something crafty with you today too! While I was away, I received an email from a reader, Michelle. She used the same method of sewing strips on fabric onto a tshirt to create this cool heart shirt!! I have a soft spot in my heart for tie-dye and love how just the heart is flashy! Super cute Michelle and thank you so much for sharing with me!!
So, I hope to be back in the swing of things here pretty soon! Hope all is well out there!
Thursday, February 17, 2011
A couple of vacation photos!
We are having a great vacation despite the fact that I had to spend most of the day Tuesday sitting in the dentist's office to get an emergency root canal. Here's a couple of photos.

Jojo meets princess Belle. He loved here & gave her hugs & kisses. He wouldn't even go near Cinderella & Sleeping Beauty!!

Sweet Pea was in Disney Princess heaven!

These two talked Daddy into getting thier faces painted while I was riding the roller coaster at Sea World. My husband doesn't do rollercoasters so it was just me & my brother in law on all the rides. I did talk Sweet Pea into a few but she was less than thrilled!
Hope everyone is having a great week!!
- Posted using BlogPress from my iPhone

Jojo meets princess Belle. He loved here & gave her hugs & kisses. He wouldn't even go near Cinderella & Sleeping Beauty!!

Sweet Pea was in Disney Princess heaven!

These two talked Daddy into getting thier faces painted while I was riding the roller coaster at Sea World. My husband doesn't do rollercoasters so it was just me & my brother in law on all the rides. I did talk Sweet Pea into a few but she was less than thrilled!
Hope everyone is having a great week!!
- Posted using BlogPress from my iPhone
Saturday, February 12, 2011
Greetings from the Road
This post is being brought to you from Sarah's iPhone.
I don't think I really mentioned it here, but I will be taking a blog hiatus this week. I'm actually writing this post from somewhere in Tennese. My husband & I, along with his parents, sister & brother in law are taking our kids to Florida for the week. Yup, Disney too :)
I had planned to do a bunch of scheduled posts to fill this week but do to a last minute trip to the vet for our dog & an emergency trip to the dentist for me, there just wasn't time.
Now that we are on the road in the motor home we've had time for crafting Valentine's & boxes to put them in!

Have a great week!
Sarah
- Posted using BlogPress from my iPhone
Thursday, February 10, 2011
Conversation Heart Clippies
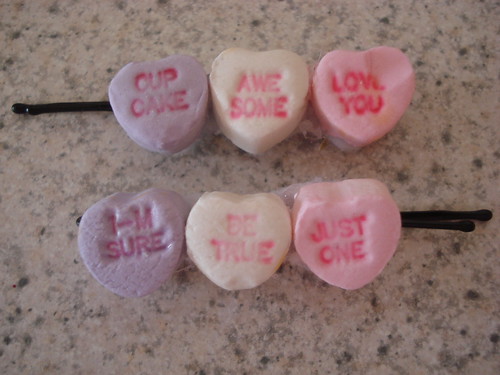
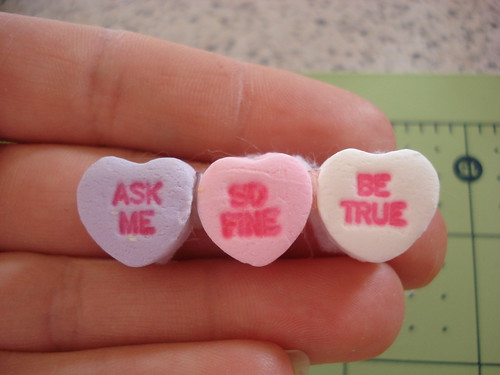
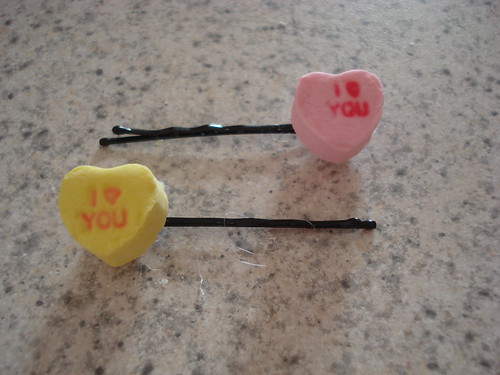
I'm not sure we want our kids wearing food in their hair for every holiday, but aren't these cute! I figure they have enough glue on them that Sweet Pea won't be tempted to eat them. Jojo on the other hand, not so much. See that photo above, yup, that the first set I made a week ago that Jojo found and sucked and licked and chewed on. That said, I suggest you make these for the older girls in your life!
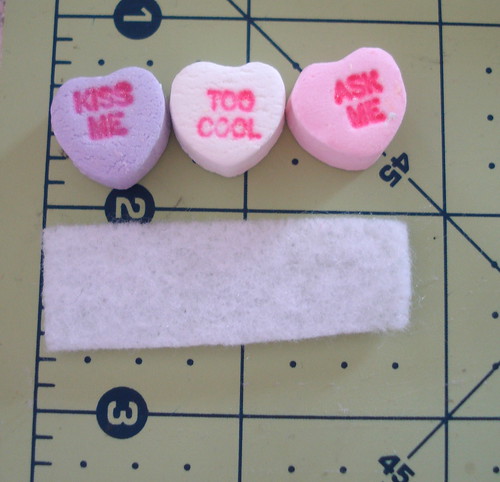
1. Start with some hearts and little bit of felt.
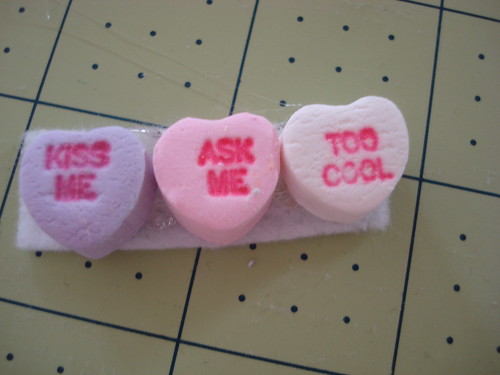
2. Using hot glue, glue your hearts to the felt.
3. Trim off the extra felt. This is a bit tricky.
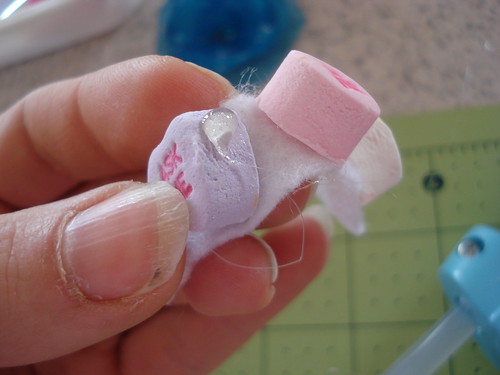
4. Fold your hearts apart and add a little dot of glue. This will help with stability. AND YUCK! Don't stare at my dirty, dry, crusty thumb nail.
5. Attach a clip of some sort. Bobby Pins, alligator clips, whatever suits your fancy.
6. You are done. These are a "one heart" clippy set. I'm thinking of attaching these to the valentines for the girls in Sweet Pea's preschool class.
Wednesday, February 9, 2011
The Love Banner
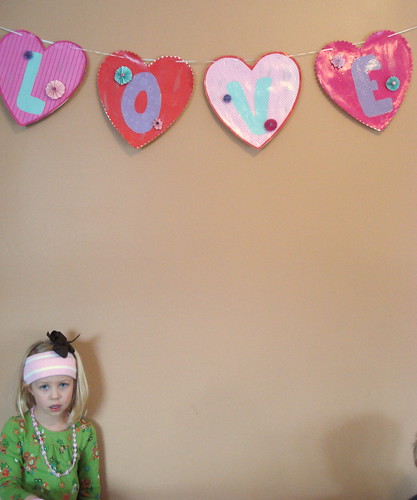
Like most craft bloggers, I have been crafty for a lot longer than I have been a crafty blogger. IT seems blogging about crafts comes from a need to find a place to document all the cool stuff you are doing! This "LOVE" banner is one of those "before I had a blog" projects. There is no tutorial or cool step by step photos. Just the finished projects which took a little wear and tear being shuffled around the basement in the "non valentine" season.
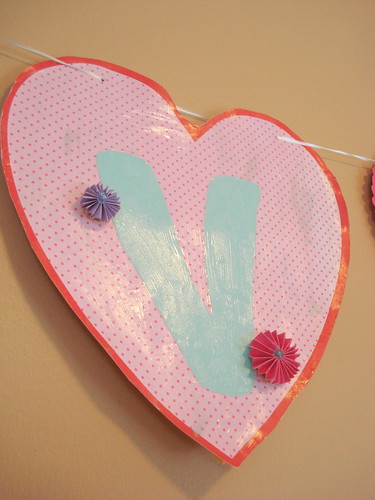
I was inspired WAY back last year by this snow banner at Mod Podge Rocks. I didn't quite have all the supplies so I improvised a bit.
1. I used paper from a scrapbook kit that was already cut in those big heart shapes.
2. I modpodged my paper to some lovely corrugated plastic
3. I cut out letters from scrapbook paper and modpodged them to the hearts
4. I made the little paper rosettes and glued them on with hot glue
5. I brushed on a little silver paint.
6. I hammered a few holes in the corners of my hearts and strung a ribbon through to hang.
I'm not sure how long this baby will last but it was fun to pull it out and hang it up again this year!
someone is not feeling the love in this photo!
I was inspired WAY back last year by this snow banner at Mod Podge Rocks. I didn't quite have all the supplies so I improvised a bit.
1. I used paper from a scrapbook kit that was already cut in those big heart shapes.
2. I modpodged my paper to some lovely corrugated plastic
3. I cut out letters from scrapbook paper and modpodged them to the hearts
4. I made the little paper rosettes and glued them on with hot glue
5. I brushed on a little silver paint.
6. I hammered a few holes in the corners of my hearts and strung a ribbon through to hang.
I'm not sure how long this baby will last but it was fun to pull it out and hang it up again this year!
Tuesday, February 8, 2011
Homemade Heart Packet Valentines
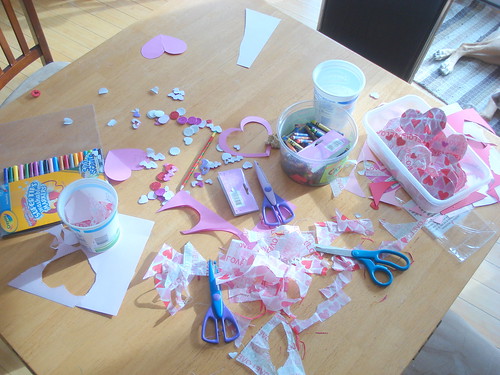
Right now the table in my kitchen looks like this.
Yup, today we tackled making Valentines for Sweet Pea to bring to school for her classmates. Her party is on Friday since they don't have school next Monday. Good thing for us since we will be in Florida!
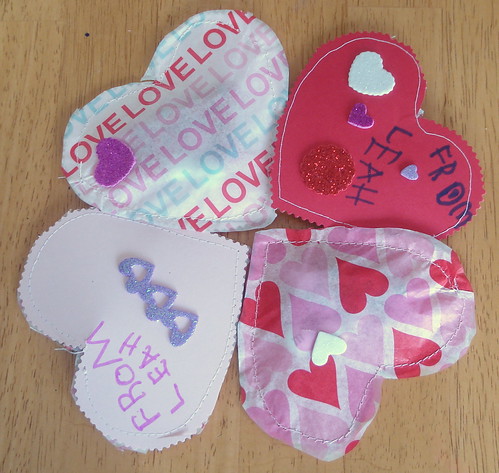
I have a "thing" about homemade Valentines. I just really like them. In fact, I've never even really looked at the tear apart card stock ones for Sweet Pea. We've made our own every year since she was one. And yes, she helped, even then. That year I set her loose with a bunch of card stock and some pink and purple paint. When she was done, I cut them into hearts, added a bit of ribbon and taped on a piece of candy. When she was two, we did homemade play dough. We cut it into hearts with a cookie cutter and wrapped it in cello bags. Last year, I set her loose with a whole mess of scrapbook supplies, a scissors & glue stick. This year, we made heart candy packets.
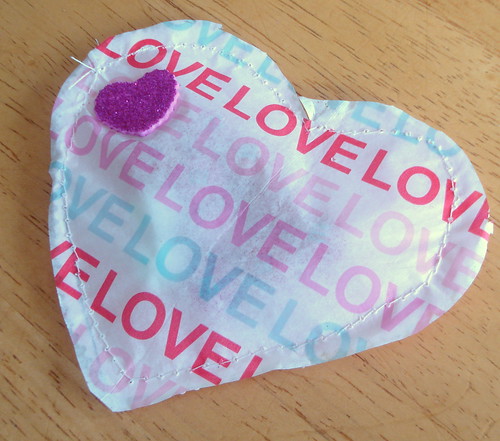
This wasn't a new or original idea. Just another take on these or these these. I drew the hearts on card stock. Sweet Pea cut them out and decorated them. I sewed them together with some cute tissue paper we found at Micheal's and stuffed them with m&m's. We cut around the edges with some fancy scissors and Sweet Pea added a few more stickers cause that's what you do when you are four.
Now, these were a bit complicated but still fun. I guess I just figure, if you are going to have your kids write their name on their store bought Valentines and stuff them with candy anyway, why not go the extra step and make them one of a kind!
Monday, February 7, 2011
Stitched Stripes T - a tutorial
Thanks so much to the following blogs for featuring this project. It makes me feel warm and fuzzy inside: Today's Top Twenty, Someday Crafts, Sugar Bee - Craft Edition
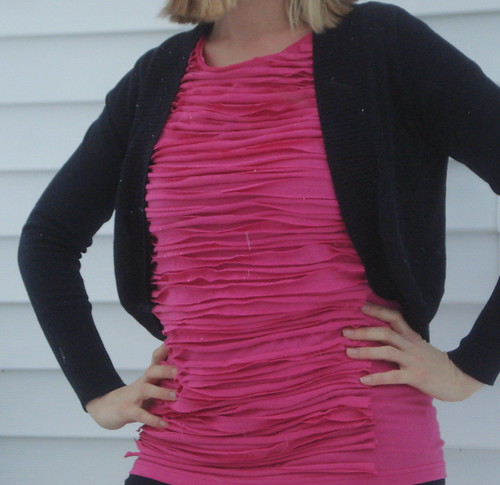
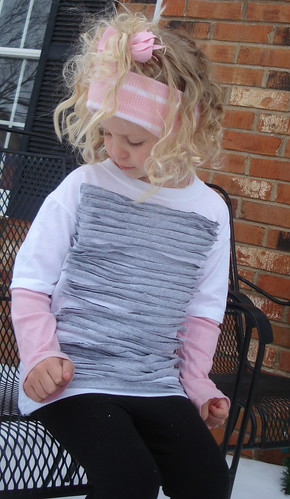
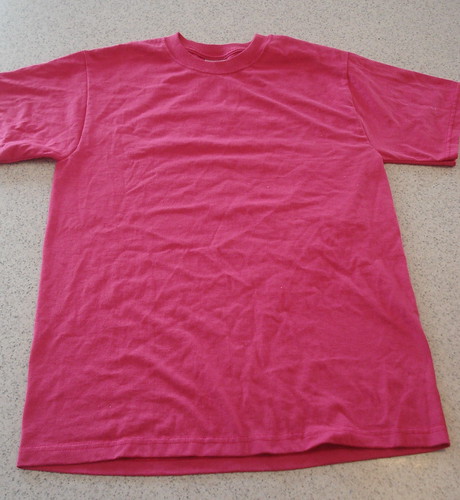
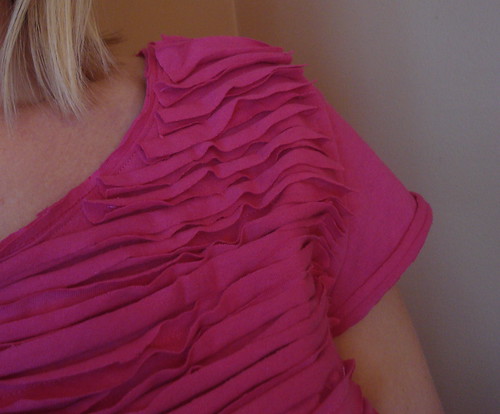
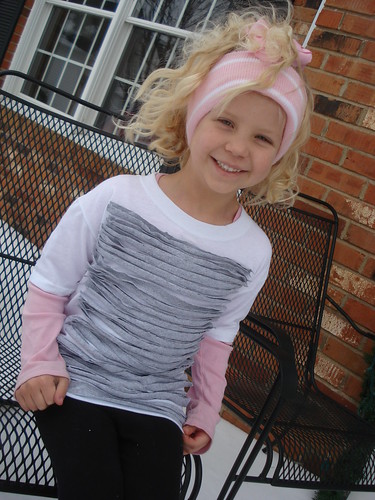
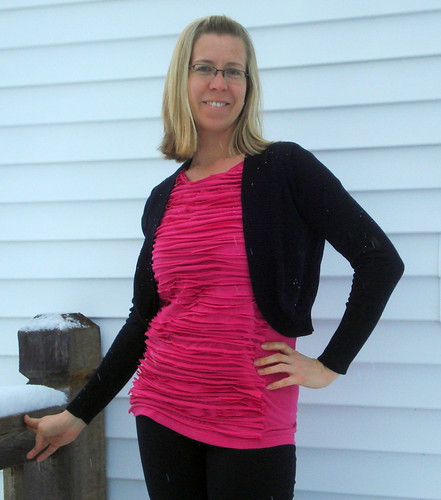
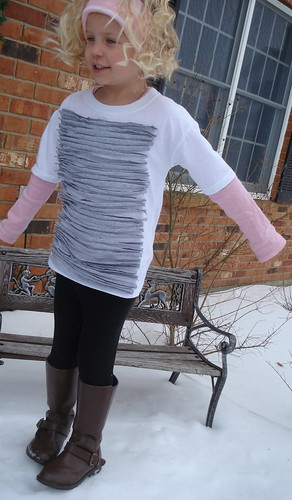
This is the tutorial for the shirt I posted on Saturday for the Embellished Five project. I fully intended to include a tutorial on Saturday but after looking at the photos, I thought it was hard to see what was happening with the pink on pink. So, to fix the problem, I made another shirt. Gray on white for Sweet Pea.
To make this shirt, you will need the following.
- two t-shirts. One for the shirt part and one for the "stripes"
- rotary cutter and mat
- sewing machine & thread, scissors, etc
Start with your fabulously boxy t-shirt number one.
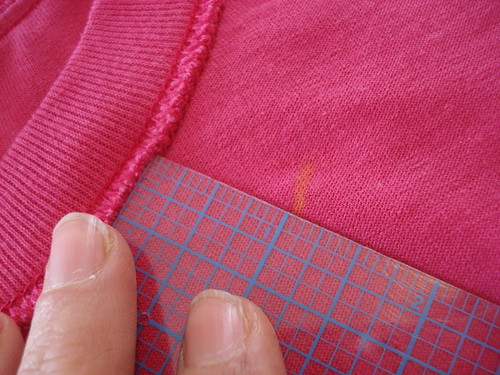
This first few steps are optional. You may not wish to modify the shape of your shirt. Here is one way to do that. You can also put the shirt on inside out, pin it to fit, take it off and sew along your pin lines. I resized Sweet Pea's shirt slightly but left the pink one alone. On the pink, I started by measuring one inch all the way around the neckline. Connect, the dots and cut along your line.
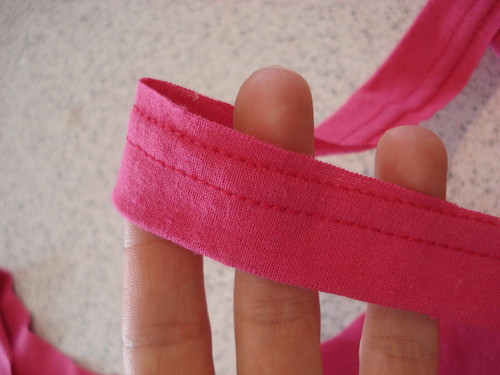
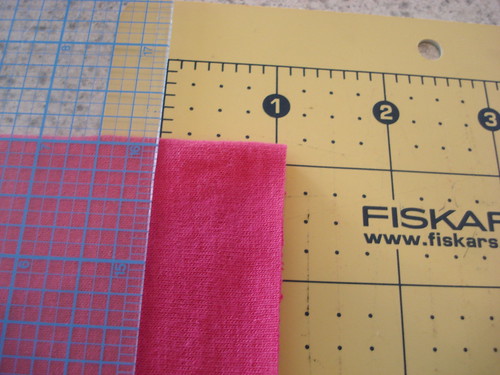
Next, find boxy shirt number two and cut off the bottom hem. Cut as close to the serged row of stitches as possible without cutting into them.
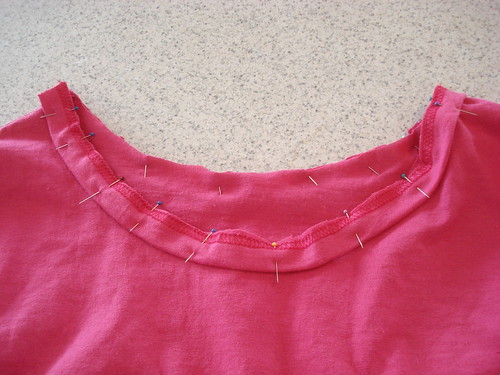
Take that piece and pin it, right sides together to the neck line of shirt number one. Sew all the way around.
Now, you may leave the neck as is. BUT, if you like the look of a raw edge, cut the folded edge off. I'm sorry I didn't take better photos of this step. It will leave you with a sturdy neck line, but a double raw edge that won't fray. I repeated the same steps with the sleeves. I cut off two inches and used the remaining hem to create a doubled raw edge.
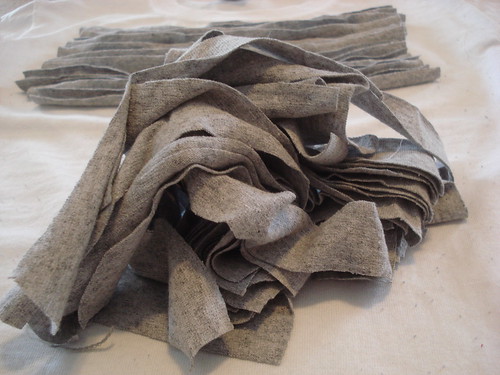
Now go back to shirt number two. Lay it flat and cut the shirt into one inch strips. Lots and lots and lots of one inch strips. For the pink t-shirt, I used almost every inch of the second t-shirt, including the sleeves.
See, lots and lots of strips!
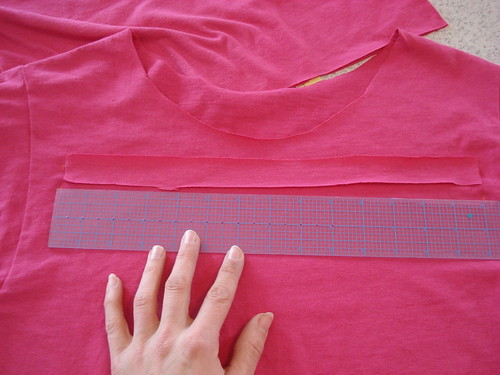
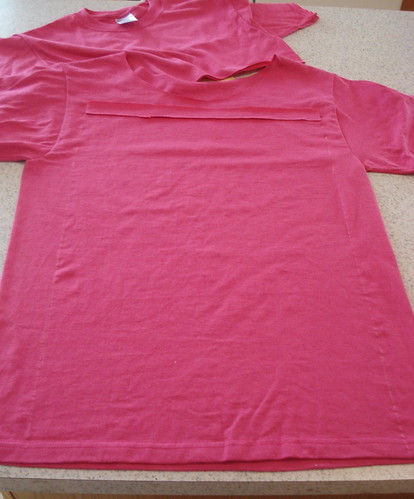
Next, go back to T-shirt number one and figure out how wide you would like your striped panel to be. Mine was fifteen inches across.
It's hard to see in this photo. But measure the length of your strips all the way down your shirt, making a mark on both sides. This will let you know where to start and end sewing on your strips. Now, take your stack of cut tshirt strips and cut them to the length you have decided on. I measured the first one and used that as a guide for the rest. They don't have to be exact.
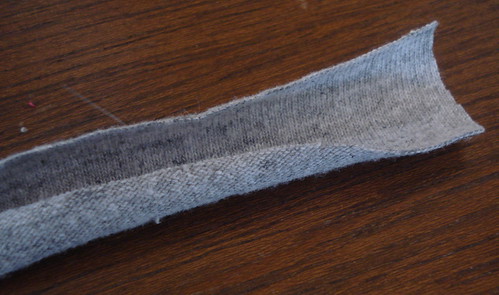
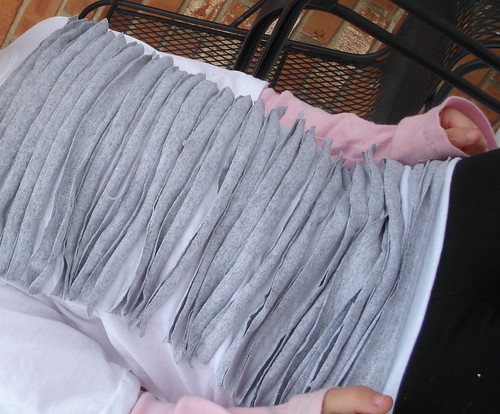
Now, go to your sewing machine and get ready to sew. I used pink thread but you could totally use contrasting thread as well. Look at your t-shirt strips. They will have a "right side" and a "wrong side". You will want to sew them on "right side" up. If you are unsure, stretch them a bit and see how they curl up. You want them to look like this.
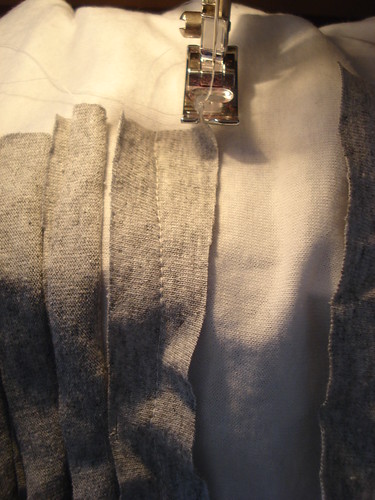
Begin sewing your strips on. I started under the neckline and then went back and filled in up to the shoulders. Place your strip on the "starting line" and sew down the middle until you reach the end. You made need to stretch your strips a bit to make them reach the other end. If you have a few that are too long, sew to the line and trim the excess off.
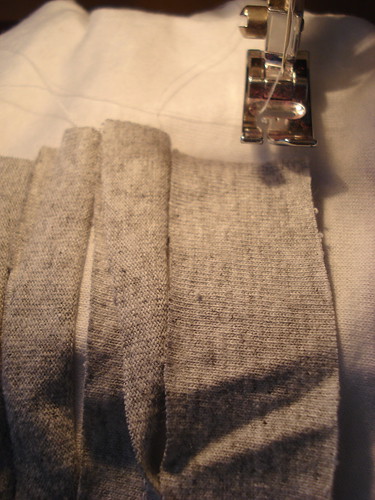
When you sew your first strip on, it will look like the one above. Just a lonely strip with a stitched line down the middle. Now you are going to add the next strip. Take the first strip and fold it on to itself, over the seam. Take your second strip and butt it up right next to the fold and stitch down the middle. This will ensure that your shirt has a "full" look. And, as long as you sewed the first strip on straight, it will ensure that the rest are sewn on straight as well! Now, continue sewing ALL the way down your shirt. If you, wish you can cut shorter strips to go up around the neckline.
Here's a few other thoughts.
-I am not a great tutorial writer. So if you have any questions PLEASE let me know.
- this shirt is heavy. You are sewing an entire t-shirt to another t-shirt.
- I think this would be really cute done in "team" colors. Or maybe a rainbow version??
-Warning: If your husband is like mine, he will think the raw edges give this shirt and "80's" look and will call you Pat Bentar and make you listen to the 80's radio station all weekend.
-if you make your own version of this shirt, will you pretty please send me an email and show me a picture?? I'd love to show off your work too!


Subscribe to:
Comments (Atom)

