Pages

Sunday, January 16, 2011

Something on Sunday - my favorite artist

I have to apologize. Last week I posted about how I'd like to post everyday. So yeah, that didn't happen yesterday. Am I the only one who has days that just get away from you. It started with a surprise trip to Cracker Barrel for breakfast where my husband bought me an accordion. Yes, a child's accordion from the Cracker Barrel gift shop. I've been eying it for ages. I really want my kids to learn how to play the accordion. I think it's a lost art! . . . . and I have a secret affection for polka music!! So yeah, I got sucked into trying to learn to play the accordion. That was followed by Zumba, a trip with friends to eat the best Chicken Wings ever. No naps for my kids. I did a quick house clean up and headed out with a friend while my husband hosted poker night. Busy stuff. So yeah a long way of saying, "sorry no post yesterday."

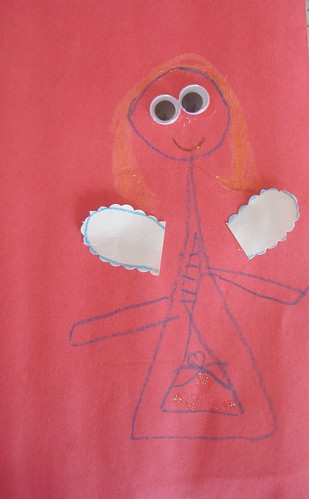
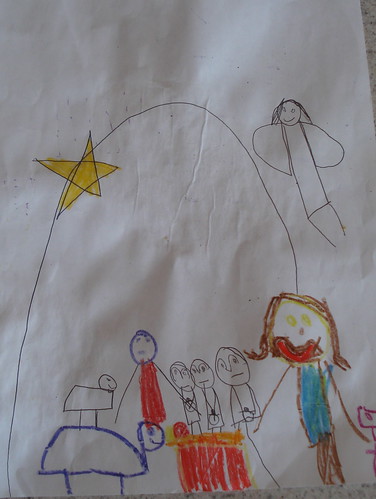
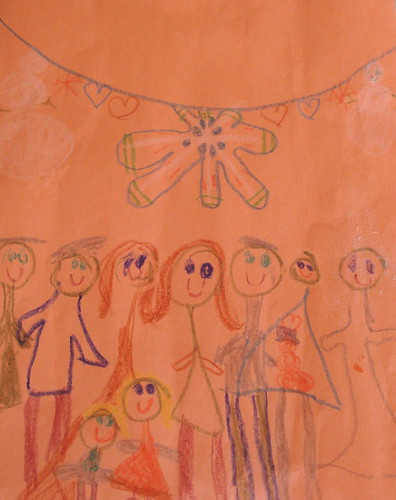
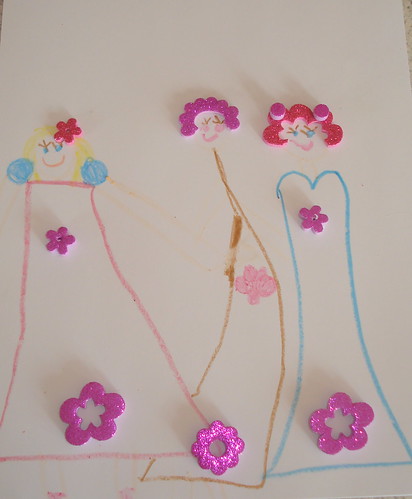
Today is Sunday though and we are having a relaxed day. After reading this post by Dana from MADE, I was inspired to tell you today about my favorite  artist. Her name is Sweet Pea and daily I am amazed by her creativity. She could spend all day drawing and coloring and gluing and cutting. It has been a pleasure to see her come up with ideas that never would have crossed my mind. I love how she wields both the scissors and the glue gun with ease at the tender age of four. As I watch her, I can only imagine what she will create as she gains more skill! The other thing I adore about her is that she LOVES to give her art away. Most visitors to our home don't leave without at least one drawing. Since, I can't mail each reader a piece of autographed art work from Sweet Pea, I'll share a few photos instead.  Enjoy!


DSC06852

DSC06851

DSC06850

DSC06849

DSC06856


Friday, January 14, 2011

Hey Check it Out !!! Facebook!!

So I finally got my brain working and cleaned up my sidebar a bit and added Sweet Pea and Jojo to the wonderful world of Facebook. I spend way to much time over there! Hope you'll like Sweet Pea and Jojo on Facebook too!

Have a wonderful weekend!


Bean Curry - recipe

I know very very little about Indian food. I eat very little Indian food because I don't know very much about it and I don't have very many recipes for it. I also don't eat a lot of beans. I like beans but my husband does not. It's bummer. Until now.

Over Christmas my sister introduced me to the loveliness that is red bean curry. The recipe calls for red kidney beans but I think it would be just fine with any type of bean. I never though I'd enjoy a big old bowl full of bean so much but this is seriously tasty stuff, especially if you need a change for your everyday chili soup recipe. So, if you are looking for something healthy to warm your belly and step out of your everyday eating box like me, give this one a try.


Bean Curry
Adapted from The Smitten Kitchen who adapted it from an Arora spice blend.

Serves 6

1/3 cup extra virgin olive oil
1/4 cup chopped fresh ginger (this is A LOT of ginger. I used it all, but adjust to your taste)
1 medium onion, finely chopped
3 cloves garlic, chopped
1 large green chili, chopped (optional)
1 teaspoon salt
1 teaspoon ground cumin
1 teaspoon ground coriander
1/2 teaspoon cumin seeds
1/2 teaspoon ground tumeric
1/4 teaspoon cayenne
8 ounce can of tomato sauce
1 can diced tomatoes
30 ounces canned beans, (the original recipe calls for red kidney beans. I used one can red kidney and one can regular kidney beans)
chopped fresh cilantro for garnish
sour cream for garnish

Heat oil in a deep sauce pan over medium heat for one minute. Add ginger, garlic, onion, green chili, and let sizzle for one minute. Add the tomato sauce, salt and remaining spices and cook for an additional five minutes, stirring frequently. Add the beans plus one additional cup of water, and tomatoes. Bring it to a boil, then reduce to medium heat and let cook uncovered for 10 minutes. Remove from heat. Garnish with cilantro and sour cream if desired.

My sister served this over quinoa. You could also serve it over rice or with naan or other bread.

Also, this recipe freezes well. I freeze it since I'm the only one in the house who loves it. I did make chicken meatballs with the same Indian spices which the kids LOVED.


Thursday, January 13, 2011

Super Sledding MIttens - Tutorial


DSC06825


It's cold here. And there is snow. Someone told me there is currently show in 49 of the 50 states. That's a lot of snow. For me, snow usually means sledding. Sweet Pea LOVES sledding. Jojo is not quite as much of a fan but he's coming around. I posted yesterday about how much I hate taking the kids sledding and seeing snow fall into that little gap that sometimes shows up between their mittens and their coat sleeve or the bottom of their snow pants and their boots. I've solved the bar leg problem by having my kids go sledding with their footie sleeper pajamas on under their snow pants. I solved the cold wrist problem by creating these serious mittens!


To make your own. You will need the following:

- fleece
- 1/4 inch elastic, enough to go around both of your child's wrists
- a pair of socks
- sewing machine, pins, thread, etc


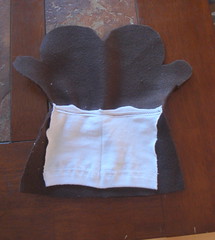
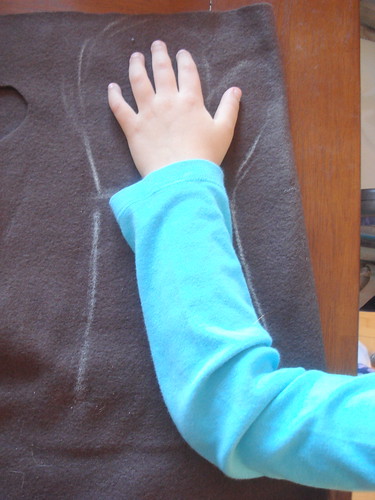
Start by tracing your child's hand or a mitten they are already wearing. Place your child's pinky finger along the fold of your fabric. (I forgot to do this in the photo) Be sure to add an extra 1/2 inch or so for wiggle room and seam allowances. When tracing, be sure to flare out the cuff as it will need to fit over your child's winter coat. Also, make a small mark at your child's wrist. This is where you will sew in the elastic.
DSC06822


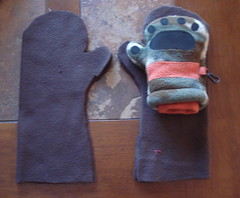
Do this twice. One for each hand and cut them out. These are Jojo mittens folded over. We traced his mitten since he was napping. 


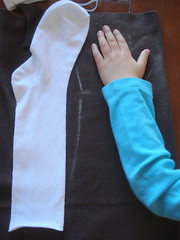
Next get out your pair of socks. I picked these up at Target. They are knee socks and worked to make both pairs of mittens for the kids.


Hold the sock up against your child's arm to determine how long you want the inner cuff of your mitten to be. I did up to the elbow for both kids. Cut off the top part of your sock.


Next, cut your sock tube open along one side. Seems a bit silly because we will sew it up in just a minute but this is what worked for me.
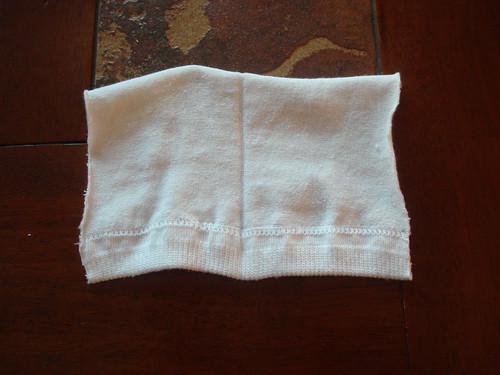
DSC06812

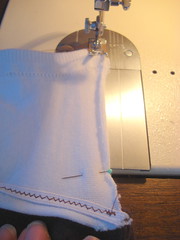
Next you will want to hem the bottom of both of your mittens. I forgot to take photos of this step. All you need to do is fold up the edge about 1/4 inch and sew. No need to finish the edge as the fleece won't fray. Next, pin one of end of your elastic and one end of your sock to the mark you made earlier where your child's wrist is. Place your sock with the wrong side facing up. This is the inside of your mitten and cuff. Stretch the sock and pin at the other side.
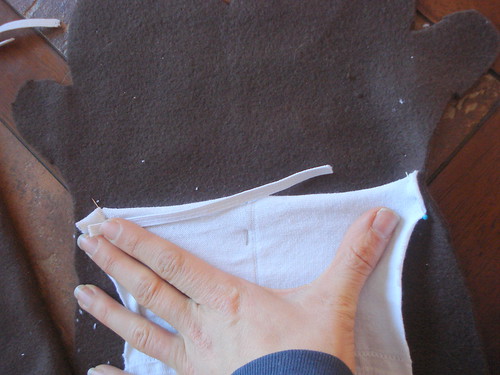

DSC06813


Next. Sew your sock and elastic down starting with a straight stitch for just a few stitches and then switching to a zig zag stitch. You will stretch both the sock and the elastic as you sew.
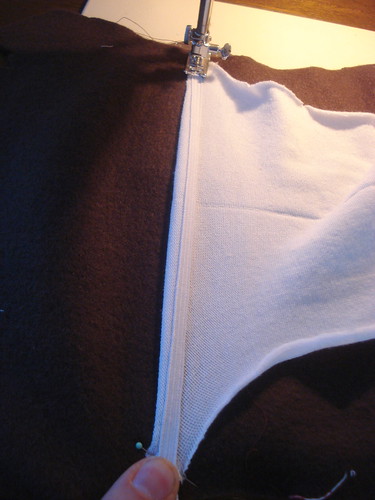
DSC06824

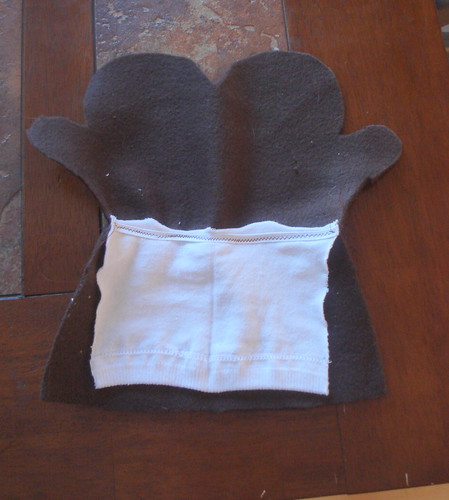
It will look something like this when you are finished sewing down the sock and elastic.
DSC06814
Now, fold your mitten right sides together. Take JUST the sock and sew up the side seam. I used a zig zag stitch for a bit of stretch. Be sure not to sew the sock to the cuff of the fleece mitten.


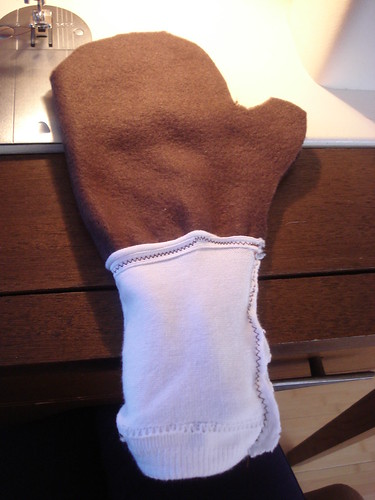
When the sock is sewn, fold it down and sew the outside seam of the mitten.
DSC06818


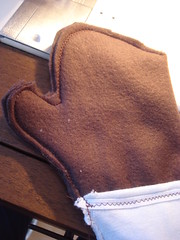
Next fold the sock portion up, and sew up the side seam of the cuff part of your mitten. Be sure to end your sewing as close as possible to the sock to close your mitten.


Trim your threads, clip a bit around the thumb of your mitten and turn the entire mitten right side out.

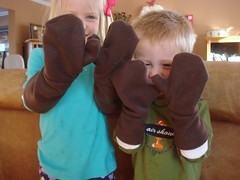
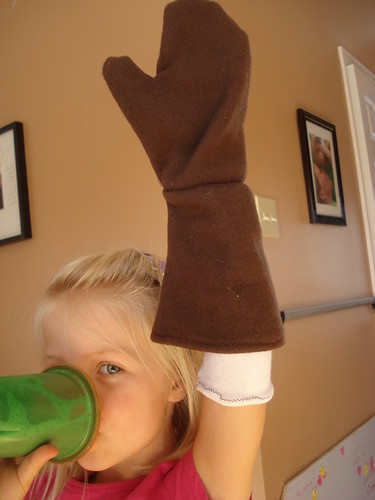
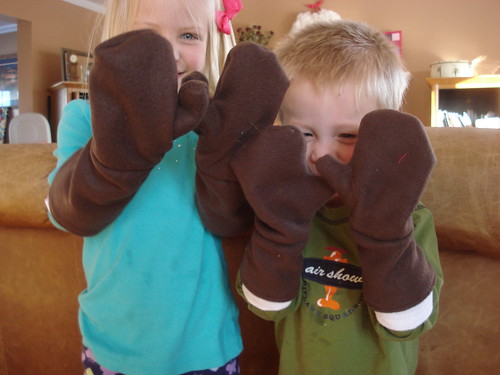
Here Sweet Pea is showing you how super duper long her mittens are, especially that inside sock layer.
DSC06838

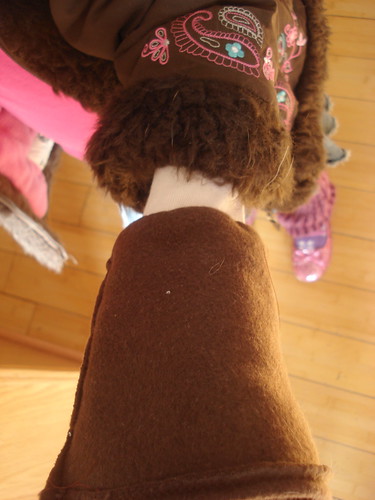
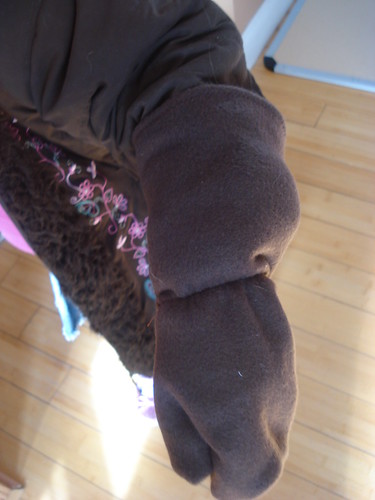
To wear these, put the mittens on. Fold the fleece up up over the hand. Tuck the sock sleeve up inside your child's sleeve. This can go under or over a long sleeved shirt. It's pretty stretchy.
DSC06839


Then fold the fleece cuff over the top of the coat and you are ready to go! There is no way any snow is getting in there!!!
DSC06841


I'm am not the greatest writer of tutorials as I am very new to this. Please let me know if you have any questions or need clarification on any of the steps! Thanks for reading and stay warm!!





Wednesday, January 12, 2011

Fabric Flower Clips

Yesterday was a rough day for me. Lots of snow, we were cold. Jojo only napped about an hour instead of his usual three hours. Sweet Pea was in a foul mood. Unlike me, my husband had a fabulous day. Good stuff at work. The good part about my bad day is that the kids went to bed around seven which left us with a couple of hours of quiet before we hit the pillow. The hubs had some work to finish up so I attacked the lining of one of his old suit coats and cut circles. Lots of little circles. To make these.


I kind of sort of followed the tutorial at Make it and Love It!   

I also whipped up a couple of pairs of these this afternoon. They are some extra long, double cuffed, fleece mittens. I sewed a sock inside the cuff that goes up to their elbows. I plan to tuck the sock cuff into their sleeve and to pull the long cuff over their coats to keep out ALL the snow!  I think I took enough pics for a tutorial if any one else wants to make some. I hate seeing cold snow in that space between coats and mittens and boots and snowpants. I even have my kids wear footie jammies when they go sledding to keep the snow off their legs!


Tuesday, January 11, 2011

Pint Sized Project - Paint Chip Mosaic

I am a big copy cat these days. There is so much fabulous inspiration out in blog land and it's way easier to do my own version of what someone else has done than to stress my brain to come up with something new . . . especially when coming up with ideas for my kids. Sometimes my brain is just fried!

So due to seeing several paint chip mosaics around blog land, I've been thinking for a while about making my own. I managed to pick up these GIANT paint chip samples from the Dutch Boy display at Walmart yesterday. And since they had so many darling shades, I picked up only Valentine's colors!! Pinks and purples just for Sweet Pea. After quiet time yesterday we went to work.


We started by modpodging a piece of tissue paper to some corrugated plastic. Turned out this step was a waste of time. You couldn't see the back ground anyway!


Then I trimmed the huge paint chips into 3.5 x 3.5 squares. I just didn't want the huge Dutch Boy logo on our mosaic. Then we glued them down. First we tried ModPodge but it made the corners curl up so we switched to some tacky craft glue. I put down the glue, Jojo picked the colors and Sweet Pea pasted them down.


Then we left to to dry overnight while we ate our roast chicken and asparagus for supper. Yes, the kids really do eat asparagus, and brussel sprouts too!


I went back and hot glued down a few curling up corners. I considered more modpodge but decided against it. Instead I dressed it up a bit with a bit of ribbon hot glued around the edges and added to the mantel.


Yeah, the lines are bit crooked and there's some stray glue, but that's what the projects the kids help with are all about right?? I'm thinking this will look really cute in Sweet Pea's room after Valentine's Day too!


Monday, January 10, 2011

Anniversary Banner

It's January 10. It's a special day around here. It's a special day because eight years ago on this day on COLD Wisconsin Friday night, my husband asked me to marry him. Seven years ago on this day we were on the beach in Mexico with thirty of our closest friends and family saying our "I DO's".


It's been a pretty fabulous seven years. We've had our ups and downs and joys and losses and weathered through them all.  It you stop by to read this, LOVE YOU BABE!! 


So in honor of our anniversary I did a bit of decorating in our bedroom. Honestly, it's been the very last room in any of the places we have lived to get much attention. It tends to be my dumping ground for the things that don't fit anywhere else. There's often a huge mountain of laundry. In fact there is now, you just can see it in these pics!! Anyway, for the past two and half years we have been looking a  great mass of whiteness above the bed.  . . . until today. 

It went from this


I was inspired by the Love Letter Banners on Our Hartbeat. She has a great tutorial that I sort of followed. I sewed my letters together on the sewing machine rather than threading them on yarn.  I picked the phrase "I Love you More" since it's was something we always said back when we were dating. And, well I love him more now than then!!  I added a few of my favorite wedding photos and a collage frame of items from our wedding as well. Looks like they are a bit crooked!!! Guess I"ll have to fix that. 

Here's to a lovely day to everyone!