Pages

Thursday, October 7, 2010

The Bat Costume

So I know there are LOTS of boys out there begging to be Batman. Or at least there must have been last year because three of the six boys in Sweet Pea's preschool class came dressed as the masked man last year. And there was my girl. She passed up princess, fairies, mermaids because she wanted to be a BAT. Not bat man. Not bat girl. Just a bat. Like the kind that flies in the sky.

um. thanks for the challenge kid.

So yeah, I did a bit of searching on the world wide web and came up with this.

So how did I do it?? Let me tell you. Can't show you since I didn't know about craft blogs then and didn't take photos of the creative process.

1. Buy an inexpensive black sweatshirt. I had zero option in the girls department, so look in the boys. Black pants are from Target. Both are size 5T.  (And she was only three at the time! Told you she was tall!)

2. Buy an umbrella. We got ours at the dollar store for a dollar. You will notice that dollar store umbrellas lack a bit of quality and are a LOT smaller than regular umbrellas. That's just fine for this project but if you are doing this for an adult, you may want to purchase a bigger umbrella.

3. Using a wire snips or pliers or whatever works for you, remove the handle from your umbrella.

4. Clip off those little extra pieces of metal that are hanging off. I don't know what they are called. Leave the pieces of metal that make the "ribs"

5. Cut the umbrella in half to form two wings. I cut a little extra off of each one to make these a little more manageable for my three year old.

6. Using a sewing machine or needle and thread, sew the "wings" into the armpit and down the body of your sweat shirt.

7. My girl wore a black stocking cap and a bat ear headband I picked up at Walgreens. I had intended to attach felt ears to her cap, but the headband worked just fine.

please note, this is a bit difficult to get on and off.

For other ideas of how to make a bat costume out of umbrellas & sweatshirts check out these tutorials.

Martha Stewart Umbrella Bat Costume

Evil Mad Scientist Labratories Bat Costume

and this year, yup, a mermaid. Coming soon :)

UndertheTableandDreaming

A nice surprise!

So I had kind of a miserable day yesterday. The morning started off good but went downhill when I dropped my iphone. Yup, smashed screen. Amazingly the thing still works just fine, but you know the shard of glass in my thumb wasn't so nice. Not sure what step I'll take next on that one, probably wait till my husband gets home from his business trip and decide if we repair, upgrade, whatever. So yeah, then I had a meeting at church. Cool, break from the kids! Choir for Sweet Pea and nursery for JOjo. Except Jojo REFUSED to go to the nursery. For some reason he loves it on Sunday mornings but HATES it any other time. So, off to the meeting he went. He was quiet but was under the table, on the chair, off the chair, mooing like a cow, rumbling like a truck, and then ran out the door. After several times of chasing him out the door and hauling him back in, I packed up and left. Over tired and miserable.

So today, 4:30 am. Up. With Jojo. Ready for another rough day.

BUT I got a sweet surprise in my tiny world of crafting and blogging about it. A huge photo of one of my projects on one of my favorite blogs! Yee haw! So Andrea from The Train to Crazy, thank you for making my morning! I linked my Apple Picking version of the Warhol dress up to her "Make it and Wear it" link party last week! So yeah, it's like a tiny bit of validation that someone other than my kids and my mom appreciates what I'm doing with my time. SO yeah, go check out this weeks party! . . . I'm going to go take a nap. Remember I got up at 4:30!

make it wear it

Tuesday, October 5, 2010

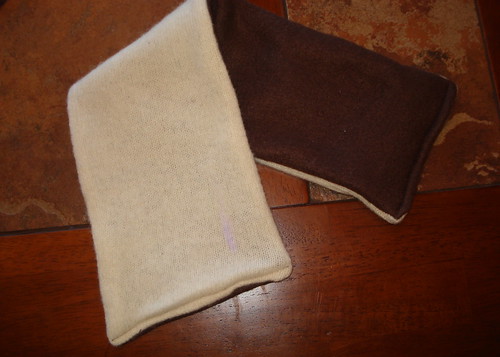
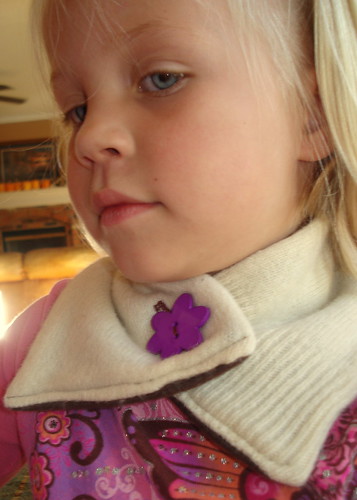
Recycled Sweater Button Scarf - A tutorial

So earlier this week Elizabeth at Twelve Crafts Till Christmas posted a tutorial for a super cute button scarf made out of bamboo felt and fleece. I put it on my to do list for when it got colder. Well, it got colder. Not quite cold enough for scarves but cold enough for jackets. But you know I wanted make scarves anyway. Now, I didn't have any felt on hand but I did have a couple of old sweaters!!

Now, please bear with me. I have never done a real live tutorial before. My photos are not fabulous and I may leave out a step or two. And I know I will be adding at least one step that was part of my experience but I recommend you leave out of yours if you decided to make a similar scarf! OKay . . .here we go.

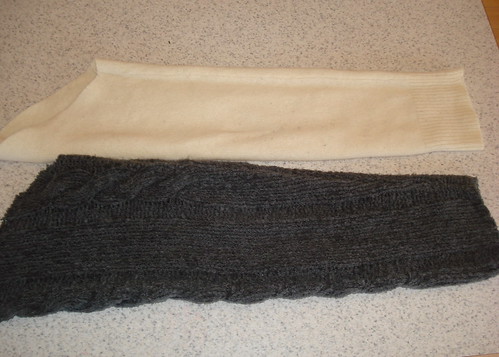
1. Find some old sweaters. Mine were in the goodwill box that hasn't made it to Goodwill yet. They were women's size medium. A bit bigger sweater would work better.

2.  Cut the sleeves off. Then cut that sleeve in half and trim to make a rectangle. Mine was about 18 inches by 5  inches for the cream scarf. If I did this again I will use a men's sweater. I would have liked these to be a little bit longer.
DSC05146
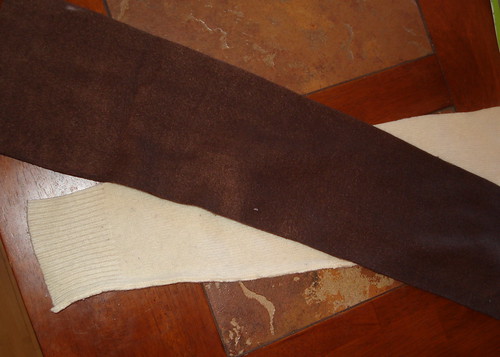
3. Cut a piece of fleece the same size as your sweater piece.
DSC05147
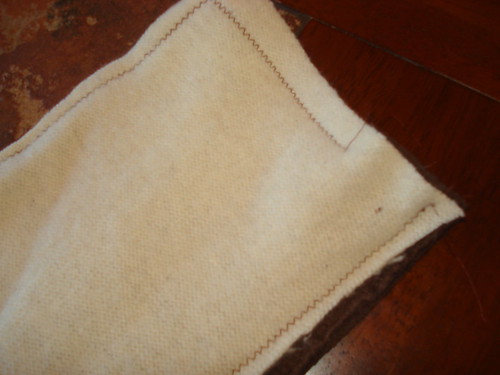
4. Place them wrong sides together and stitch around, leaving a small opening to turn.
DSC05149
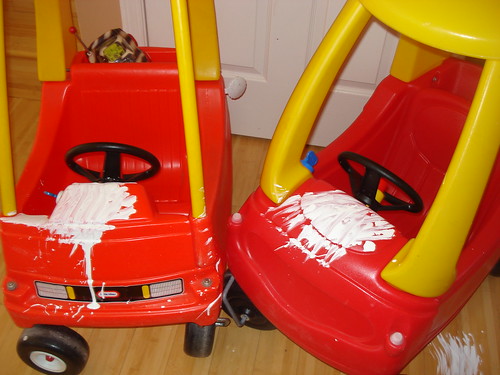
5. Sit and wonder why your two year old is being so darn quiet. Holler at him a few times until he comes running. If he is covered with white craft paint, stop, take a break, give him a bath, & scrub down all the things he painted on. Oh and don't forget to take a photo of his paint job to post on your blog. Have a talk with his four year old sister about leaving the drawers in the craft cabinet open.
DSC05150
6. Return to your scarf. Turn and sew shut. I did this by sewing a small line of top stitching across each end but do it however you wish.
DSC05151
6. Try it on your kid. Figure out the best spot for the button and hole.
DSC05152
7. Make a button hole. Sew on the button. Put it on your four year old.
DSC05154
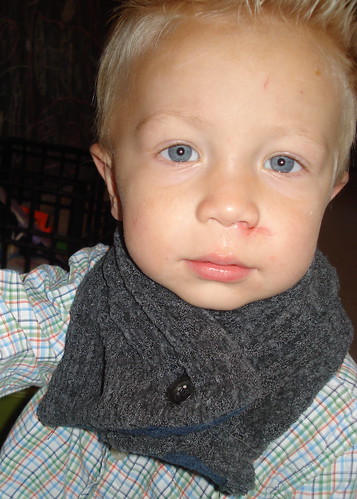
8. Make another one for the cleaned up toddler.
DSC05156

Any questions?? Oh, why does Jojo have a big scratch on his nose??? Because Sweet Pea decided it would be a good plan to drive the PowerWheels Car under a low hanging tree branch. It was not a good plan! Yet another thing to have a talk with her about.


Done!


Sunday, October 3, 2010

Pint Sized Project - nature art


So I have been on a hunt for nuts. Like a squirrel. Sweet Pea loves making pictures out of little bits of everything (fabric scraps, paper, etc) and I thought this project would be her cup of tea. It was. In fact, she made three or four pictures before she agreed to glue one down. I know we aren't the first people to do something like this and I can understand why, it was fun even though JoJo spent most of his time trying to eat acorns and feeding them to the dog. He was very helpful with the owl though. I put down the glue and he pressed on the nuts!


So this is what we did:

1. Let your kids pick up a WHOLE bunch of nuts, twigs, leaves etc while playing at the park on a Thursday. Spill them in the car. Pick them up. Watch your two year old eat them. Watch him spit them out. Spill them again in the house. Pick them up again.

2. Make a base. We used some corrugated plastic because I have a mountain of it in my basement. Cardboard or a piece of wood would work just as well.

3. Cover with paper of your choice. Interestingly, the paper we used was a paint sample. A big paint sample. (thank you interior designer sister!) I used a glue gun.

3. Play with your goodies. Make a picture, make a pattern, whistle with an acorn cap. Your kids will think you are cool.

4. Glue down your pieces. I used the good old glue gun. Sweet Pea pointed, I squirted glue, she put down the piece. For Jonah, I picked the spot, he put down the piece. Lots of fine motor skills practice!!

5. Embellish as you wish. I added some strips of fabric around the edges, a couple of walnut pieces at the corners & another strip of fabric to hang it. Sweet Pea's we left plain for now. I think I'll give it an edge and hanger and put it in her room. Oh and it's a boat. Cant' you tell?? That leave is the sail! She was bummed we ran out of room to make an anchor.


<a href="http://thegirlcreative.blogspot.com/search/label/Just%20Something%20I%20Whipped%20Up" target="_blank"><img alt="The Girl Creative" src="http://i456.photobucket.com/albums/qq286/happielife32/JSIWU_BUTTON.png" /></a>

Saturday, October 2, 2010

Fancy Pants


Miss Too Tall Jones loves these sparky jeans I picked up at a garage sale over the summer. Unfortunately every time she wears them she looks like she is waiting for a flood. Yup, just a big short for my tall girl. Fixed theses babies up with a sparkly pink remanant from JoAnne & a little help from the tutorial from "From an Igloo". And yes, she loves those shoes. She's on her third pair. Thank you Grandma Sally.


UndertheTableandDreaming


- Posted using BlogPress from my iPhone

Pint Sized Project - painted poster

So sorry for the really sad photos. Darn husband and his need to take a camera on a business trip to Green Bay of all places!!


So there are several projects around the blogosphere that feature making Subway style art by applying vinyl letters to wood or canvas, painting and the peeling them off. I like the idea but don't have a fancy Cricut machine to make my own vinyl letters and such. So we came up with this.

1. Dig up an old poster frame. My husband's office changed all their logos so I have random posters and such in my basement. Take it apart.

2. Cut your letters out of good old contact paper. I free handed these but you could trace words that you had printed as well. Especially if you are using clear contact paper.

3. Peel and stick your letters to the pressboard portion of the poster frame. You know the sort of ugly brown part.

4. Let your kids loose with a mess of craft paint. A mess. We did this twice. Let them do two colors the first time and then a couple of more the second time. Cover the whole back ground. We didn't use paint brushes. We just squirted it on an rubbed it all around.

5. Peel up the letters. My four year old helped with this.

6. Leave as is OR go back and paint in your letters.

7. Put your frame back together and hang it up!


- Posted using BlogPress from my iPhone

Friday, October 1, 2010

Food as a Craft

Cooking & baking are crafts too, don't you think?? If you don't you should really catch an episode of Top Chef: Just Desserts. Makes me want to run right out and take classes to become a pastry chef!! It a whole lot of gorgeous yumminess. Makes the lumpy chocolate chocolate chip cookies & apple pie I made today look sad. It's the taste that counts though right!!

So yeah, I made cookies & pie yesterday & EIGHT pans of Chicken Divan casserole. I only needed to do six for the meal swap my playgroup did last night (everyone makes 6 & then we all go home with one of each) but made some extra for my own freezer! It was fun & I am excited to try the 6 new meals in my freezer.


I was feeling pretty crafty putting these all together. Lots of layering, chopping & embelishing with cheese!


- Posted using BlogPress from my iPhone